ADVERTISEMENT
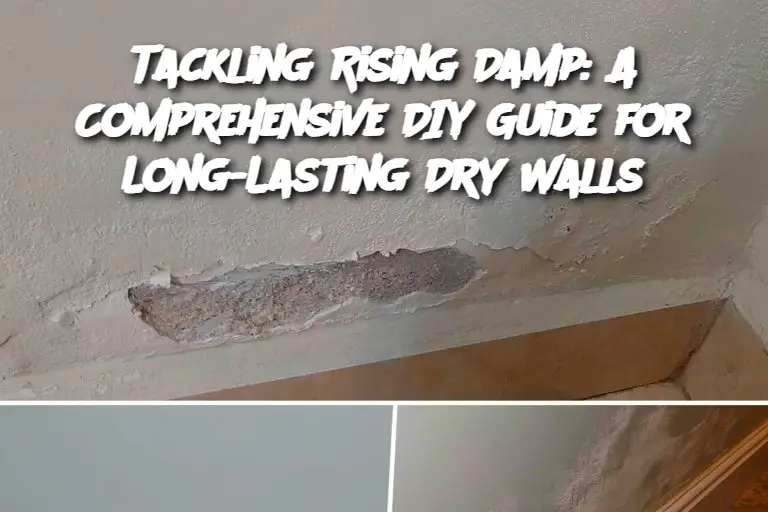
Introduction: Rising damp is a common problem for homeowners, often leading to unsightly and damaging effects on walls. Over time, moisture from the ground moves upwards through porous materials in walls, leaving behind stains, mildew, and even structural damage. The good news is that with the right approach, you can fix rising damp yourself, saving money and preventing long-term issues. In this guide, we'll walk you through a simple DIY solution for ensuring your walls stay dry and healthy.
Ingredients:
Damp-proofing membrane (DPM)
Damp-proofing cream or liquid
Waterproof render
Plastic sheeting
Masking tape
Caulking gun
Putty knife
Paintbrush
Safety gloves
Protective eyewear
Moisture meter
Instructions:
Assess the Extent of Dampness: Begin by checking the dampness levels using a moisture meter. Identify the affected areas to ensure you only treat those sections of the wall.
Prepare the Area: Clear the area of any furniture or obstructions. Use plastic sheeting to protect floors and other surfaces from damage. Wear safety gloves and goggles to avoid exposure to chemicals.
Remove the Affected Plaster: For severe dampness, the plaster may need to be removed. Use a putty knife to carefully scrape away any damaged plaster, exposing the brick or masonry behind.
Apply Damp-Proofing Cream or Liquid: Using a caulking gun, apply a layer of damp-proofing cream or liquid to the exposed masonry. Make sure to apply evenly and cover the full height of the affected wall. For larger walls, consider applying multiple layers to ensure maximum protection.
Install a Damp-Proofing Membrane: Once the damp-proofing product has dried, apply a damp-proofing membrane over the treated wall. This will act as a barrier to prevent further moisture from rising.
Re-plaster the Wall: Once the damp-proofing membrane has set, re-plaster the wall with waterproof render to ensure it is fully sealed. Allow the plaster to dry completely before moving to the next step.
Paint the Wall: Finish the process by painting the wall with a moisture-resistant paint. This will further protect your wall from any future moisture intrusion.
Check for Leaks: After everything has dried, recheck the wall with the moisture meter to ensure no dampness remains.
Serving and Storage Tips:
Keep the area dry and well-ventilated after applying treatments.
Store leftover damp-proofing cream or liquid in a cool, dry place, away from heat and moisture, to maintain its effectiveness.
Avoid storing any items directly against treated walls for at least a week.
Variations:
ADVERTISEMENT
