ADVERTISEMENT
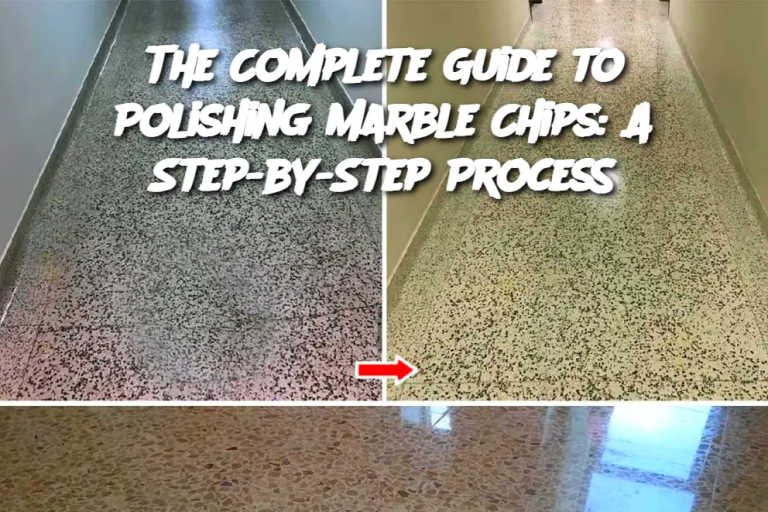
Introduction: Polishing marble chips is an excellent way to enhance their natural beauty and restore their luster. Whether you’re working on a countertop, a garden pathway, or a decorative stone feature, properly polished marble chips can add an elegant, high-end look to your space. With the right tools and techniques, polishing marble chips can be a simple yet satisfying project that yields impressive results. This guide walks you through the steps, offering useful tips and information for perfecting your marble chips.
Ingredients:
Marble chips (crushed or whole, depending on your project)
Water (for wet sanding)
Sandpaper (grit ranges from coarse to fine)
Diamond polishing pads or a polishing machine
Polishing compound (optional for added shine)
Soft cloth or microfiber towel
Bucket or large container (for water)
Instructions:
Prepare the Marble Chips
If the marble chips are dirty or have built-up grime, start by washing them. Place the chips in a bucket and rinse them under warm water. Use a soft brush to scrub away any dirt or debris. Allow them to dry completely before beginning the polishing process.
Set Up Your Workspace
Choose a well-ventilated, flat surface where you can comfortably work. Lay down a protective cloth or plastic sheet to prevent any damage to your workspace. Ensure that you have all your materials within easy reach.
Wet Sanding
Start with a coarse sandpaper (around 50-100 grit). Wet the sandpaper and gently rub it over the surface of the marble chips. The water helps to reduce dust and provides lubrication. Begin with small circular motions, applying light pressure. This step helps to smooth out rough edges and prepare the chips for finer polishing. Change the sandpaper regularly to avoid clogging.
Progress to Finer Sandpaper
Once the chips are smoothed out, switch to a finer grit sandpaper (200-400 grit) and repeat the sanding process. The goal here is to remove any scratches left by the coarse sandpaper. Continue wet sanding, making sure to rinse the chips frequently to avoid buildup.
Polishing
After the sanding process, switch to a diamond polishing pad or use a polishing machine if available. These tools are specifically designed for marble and will help bring out the natural shine. Start with a low-speed setting and gradually increase the speed as you work. Apply light pressure as you polish the chips in circular motions.
Add Polishing Compound (Optional)
For an extra level of shine, apply a marble polishing compound. Dab a small amount onto a soft cloth or polishing pad, and work it into the surface of the chips in circular motions. The compound helps enhance the marble’s reflective quality, giving it a high-gloss finish.
Final Clean and Buff
Once you’ve polished all the chips, wipe them down with a microfiber towel to remove any excess compound or residue. Buff the surface gently to reveal a smooth, shiny finish.
Serving and Storage Tips:
Serving: Polished marble chips are typically used for decorative purposes, such as in landscaping, garden pathways, or as part of home décor (e.g., countertops or mosaics). Display them in bowls or use them to create striking patterns in a variety of designs.
Storage: If you have leftover polished marble chips, store them in a dry place away from direct sunlight to prevent any discoloration or dulling. Keep them in an airtight container to avoid dust accumulation.
Variations:
ADVERTISEMENT
